Paper Models
I have been building model cars and planes almost as long as I can remember, whether I was learning from my dad, building a Christmas present or just figuring it out by myself. The only drawback that I have found frequently with these projects is that plastic models (or any models for that matter) tend to be quite expensive and between paying for all of the different projects I am always involved in and being very reluctant to use my funds too quickly, they often don't fit into the budget. I came up with the solution for this rather spontaneously when I was still quite young; design models myself and build them out of cheap materials. My material of choice was card stock and I have been building model aircraft out of this ever since. Most of my models are rather hard learning curves and I learn a lot every time I make one, sometimes even advancing so far in my ideas and methods that I never even complete the model, seeing so many things that could be so much better that what was just my greatest masterpiece becomes a piece of junk. Here are some of my latest projects.
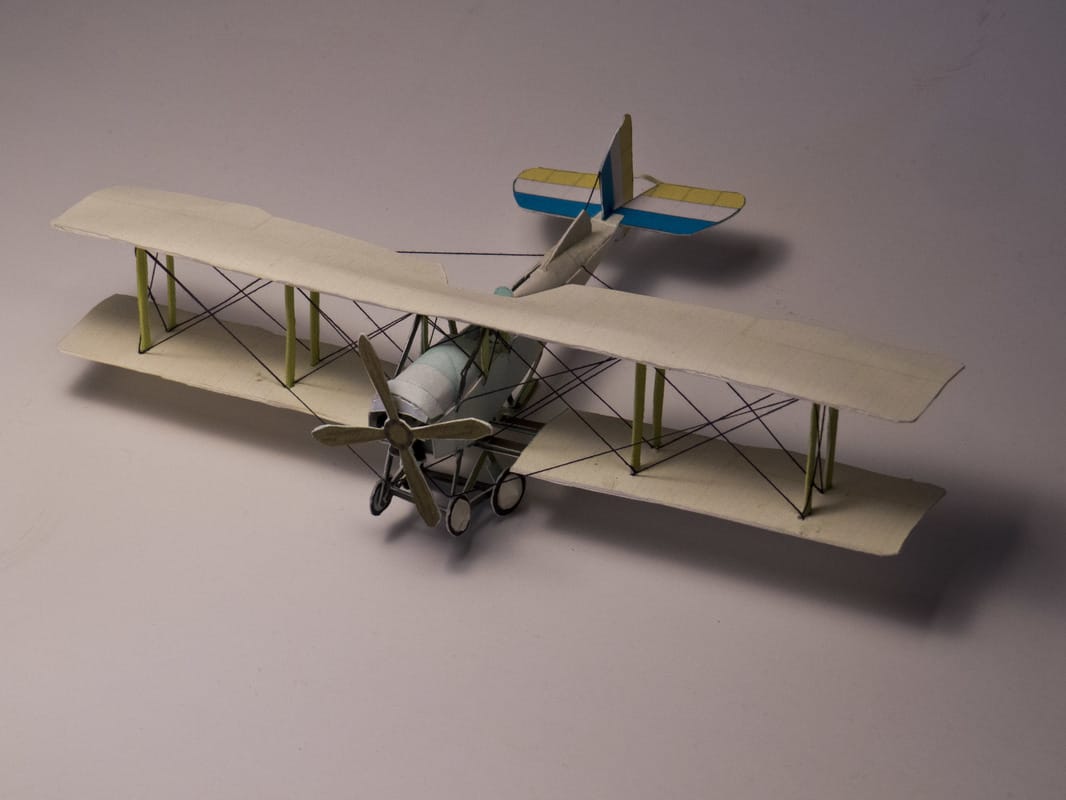
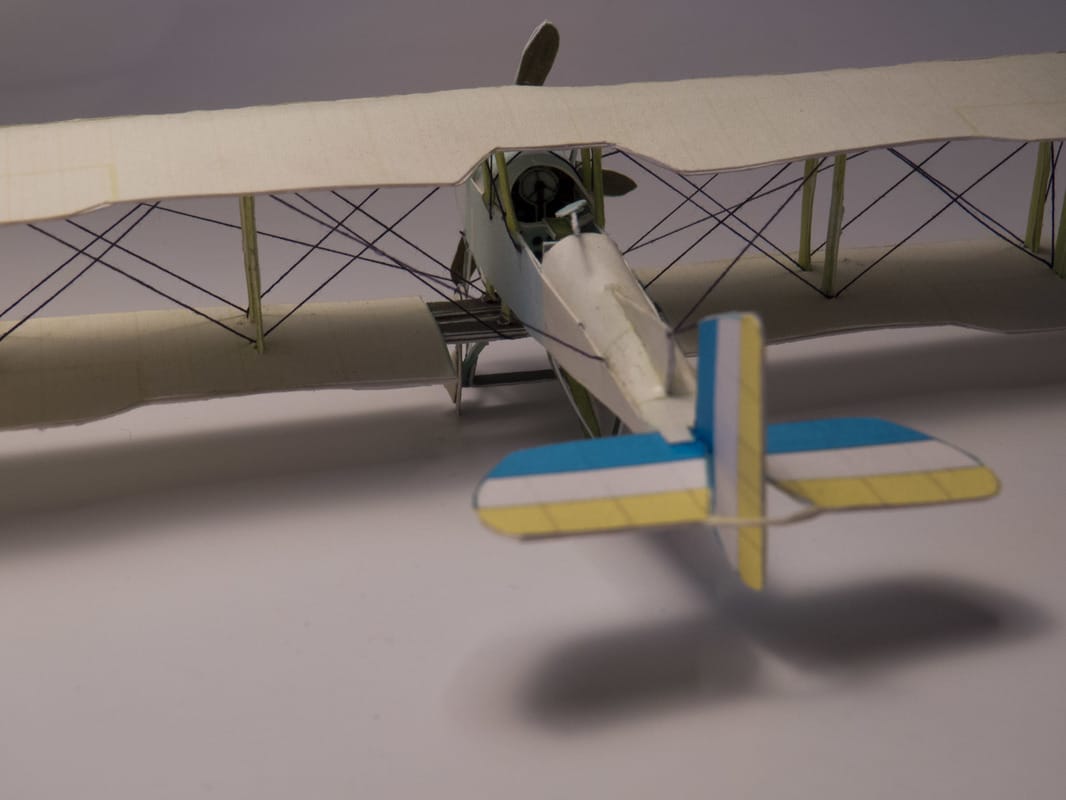
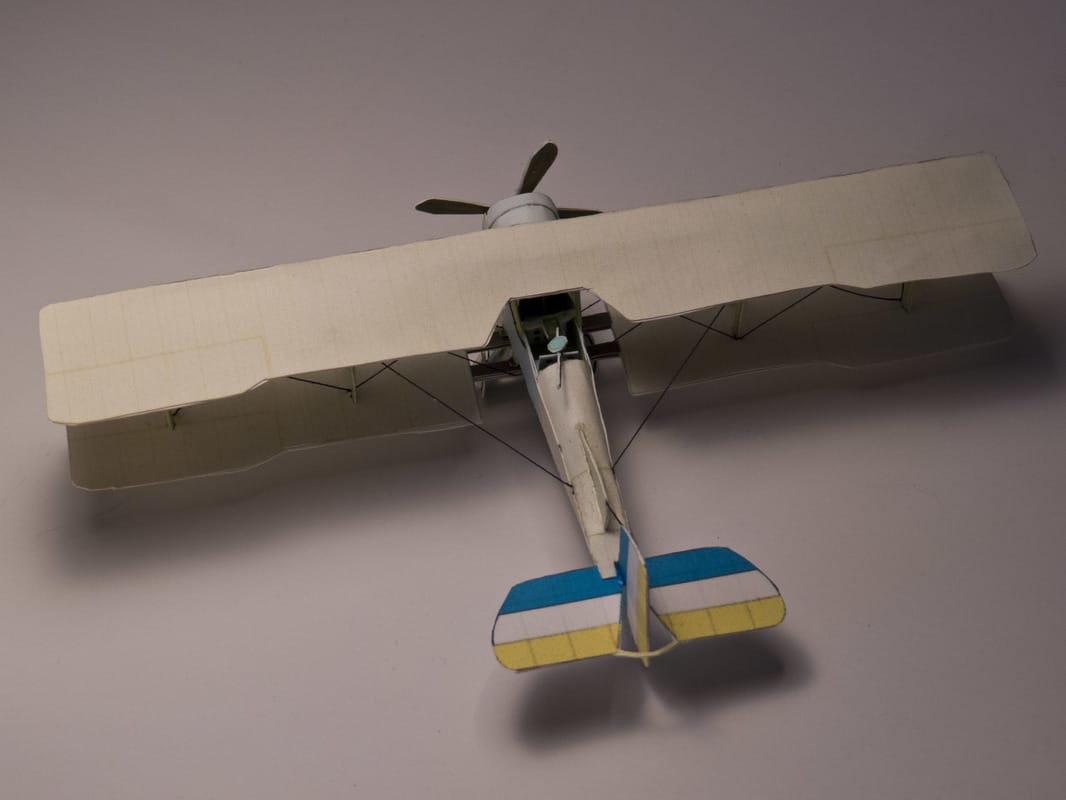
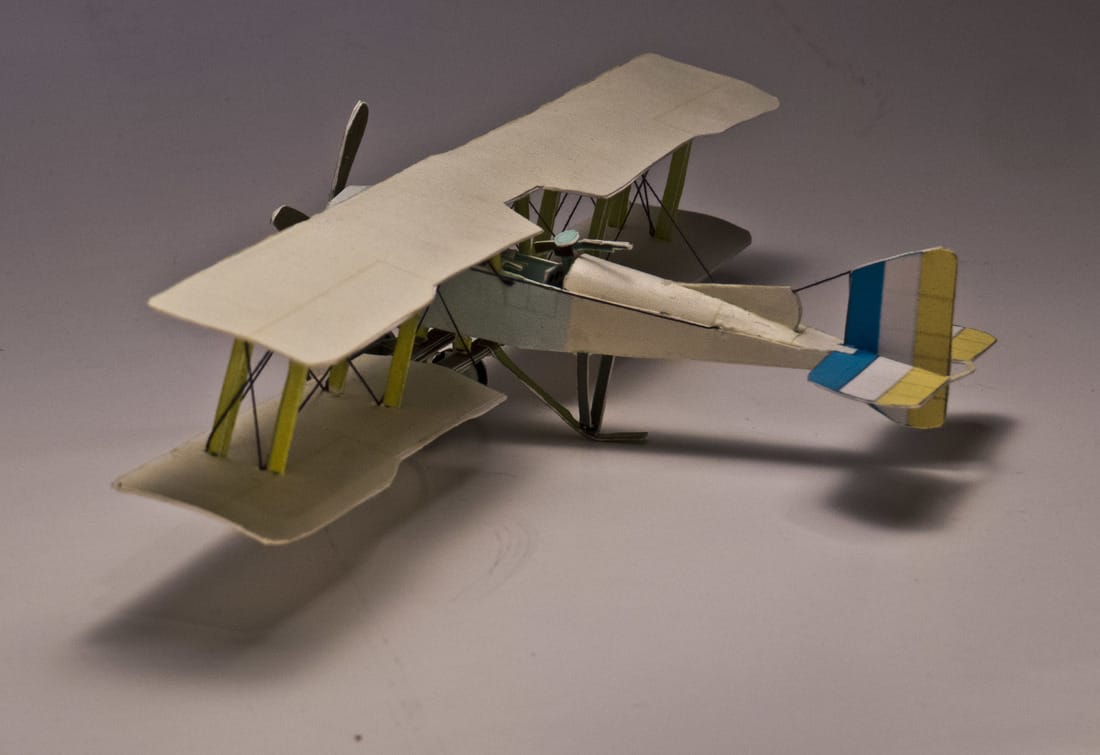
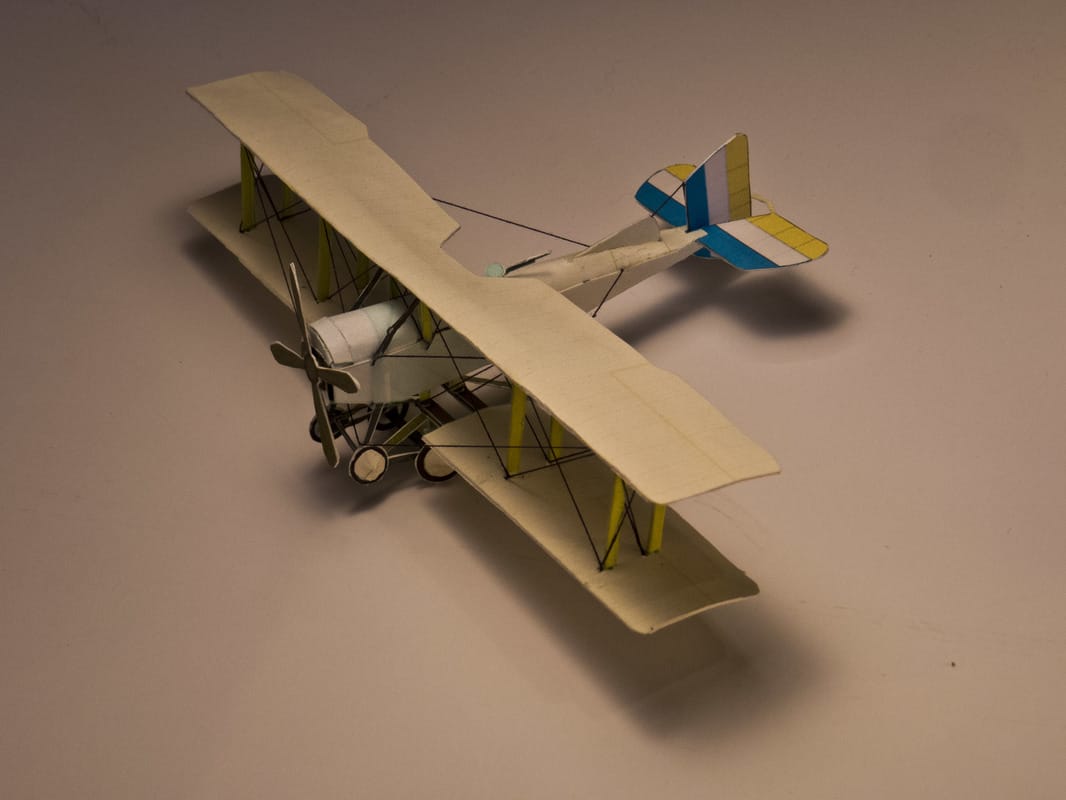
Breguet AG.4
This is my second Inkscape generated paper creation, a 1/72 WWI Breguet AG.4. Despite a much more complex structure in comparison to my previous Morane Saulnier H, the construction and design processes went very easily and the only thing I wish I could change is the tail colors (the yellow part was supposed to be red, but my printer wrecked it). The construction is all cardstock except the rigging, which is made from black thread.


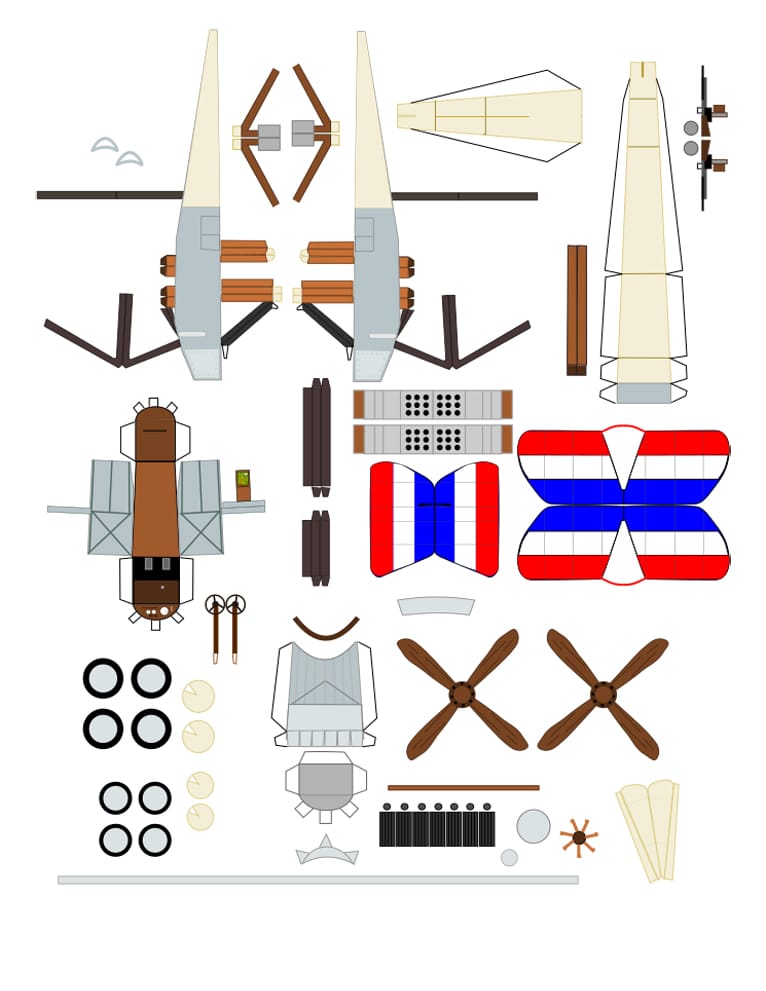
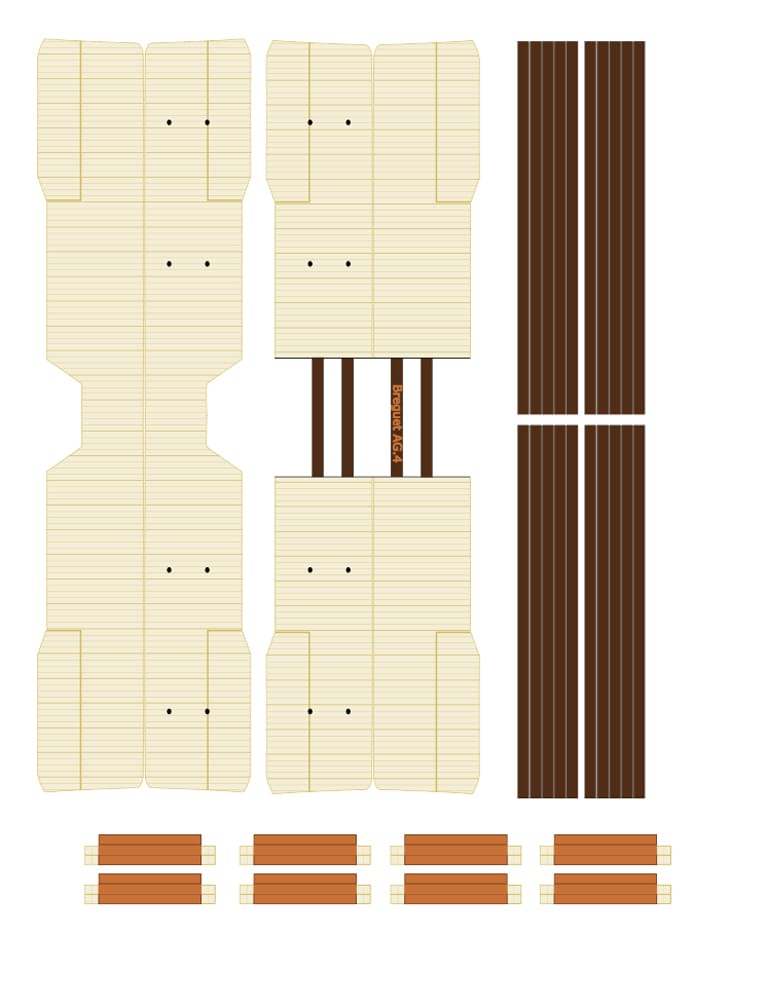
The model templates (click to expand). The pieces are generally laid out in a top to bottom order for construction.
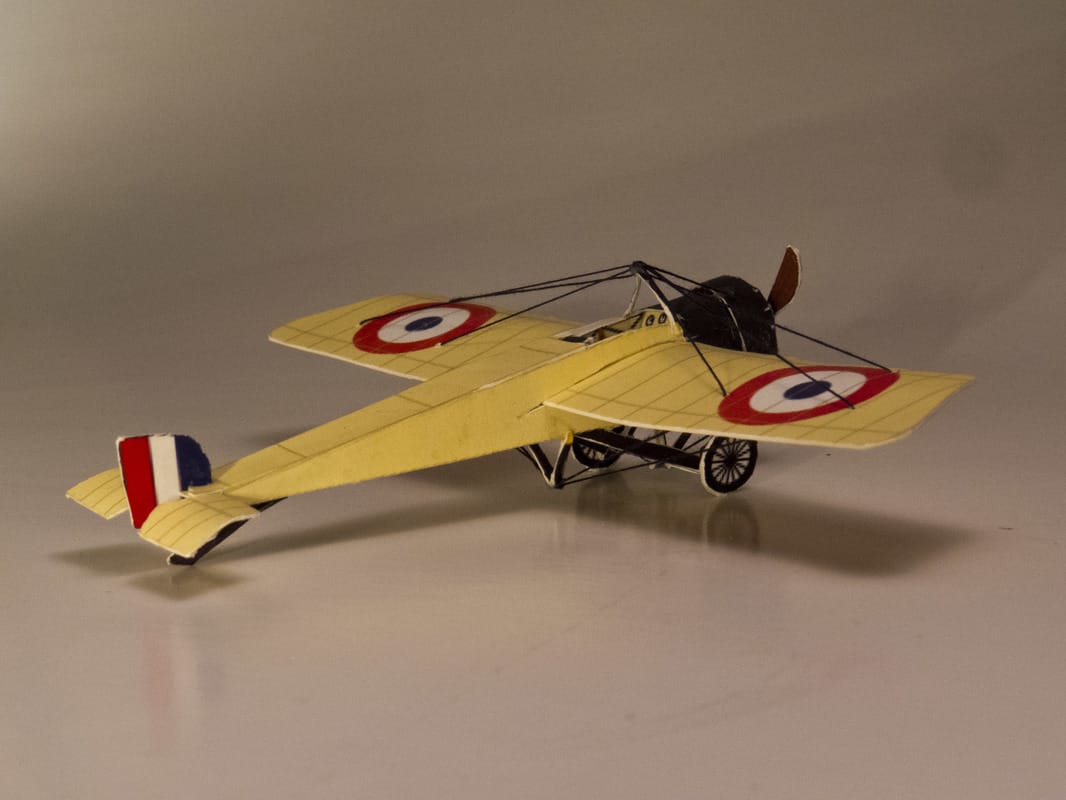
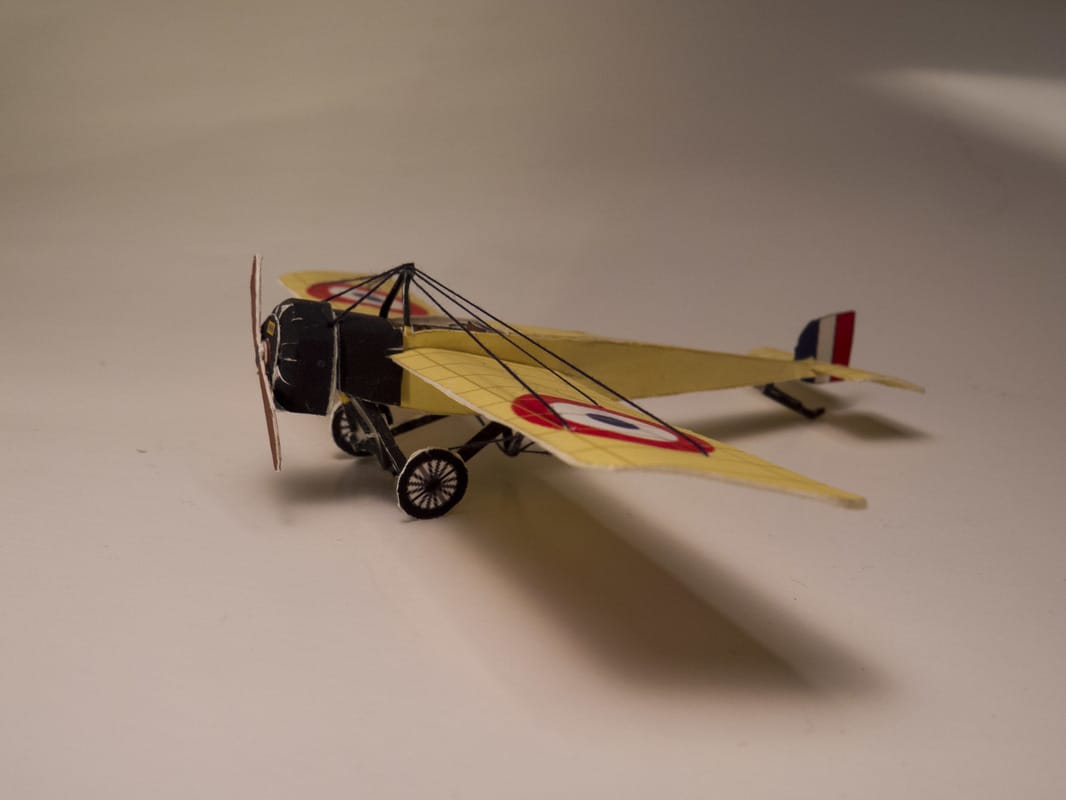
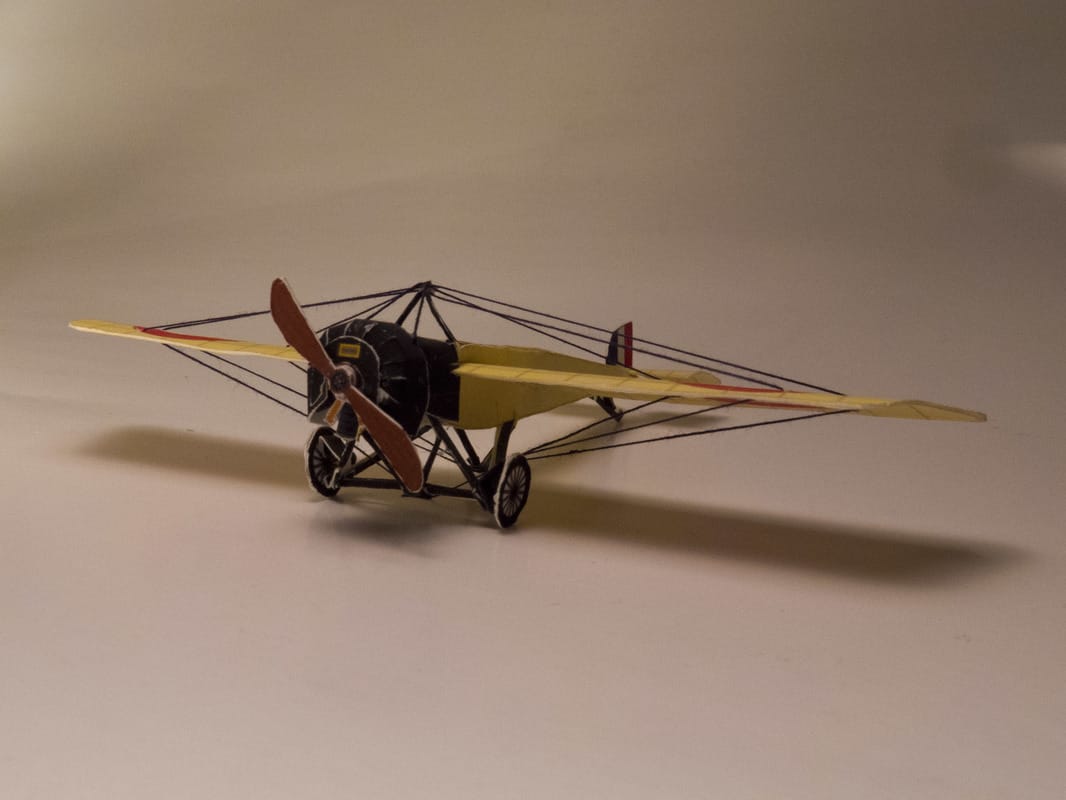
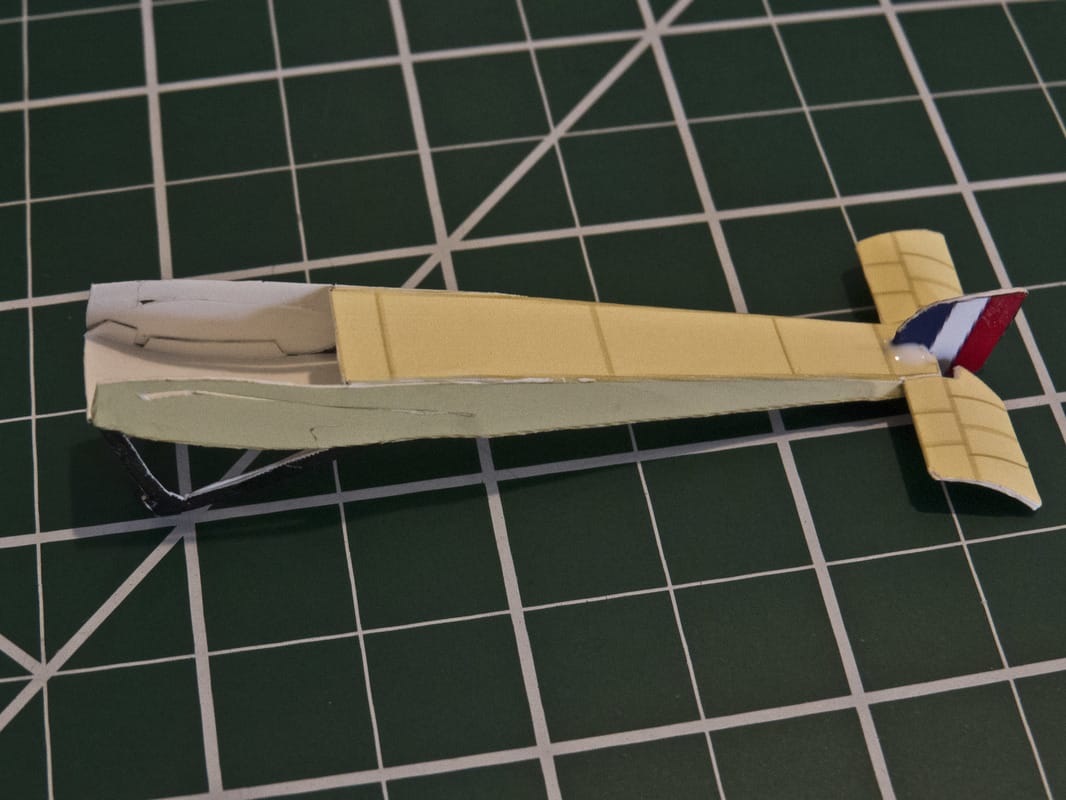
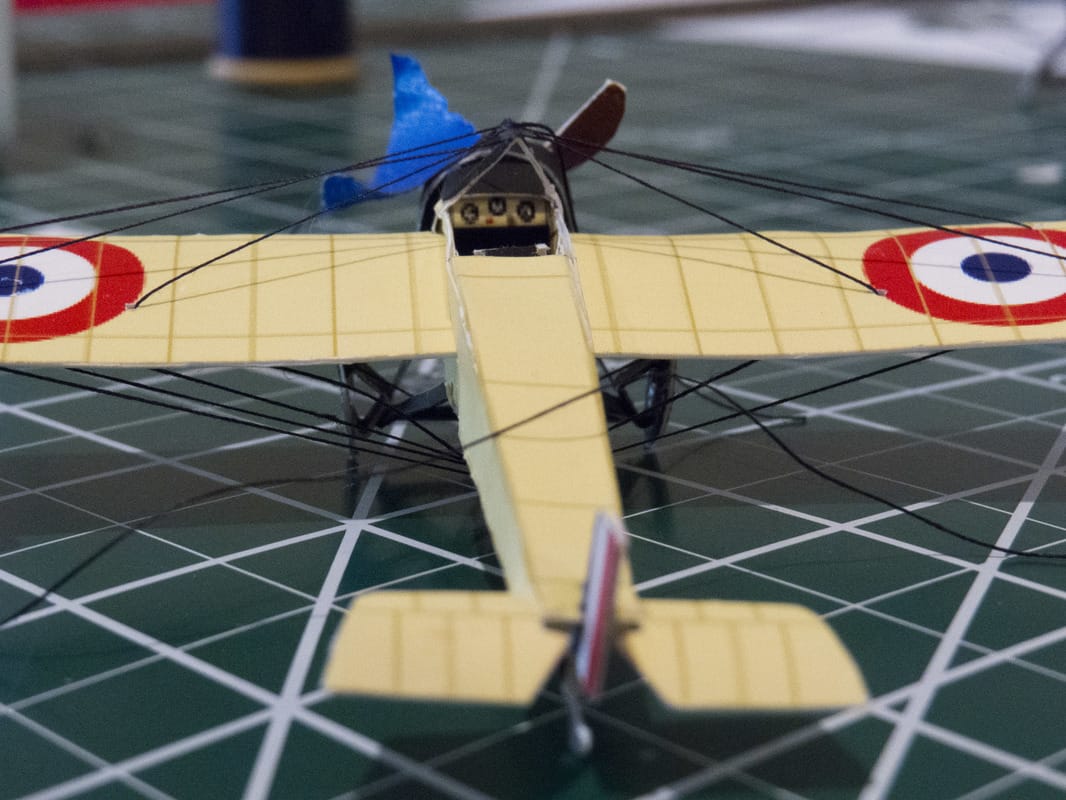
Morane-Saulnier H
The product of my first experiment with digitaly designing a paper model, I created the template for this 1/72 scale WWI Morane-Saulnier H in inkscape. Constrution went very smoothly and the model is made completely from cardstock, with the exception of the black thread used for rigging.

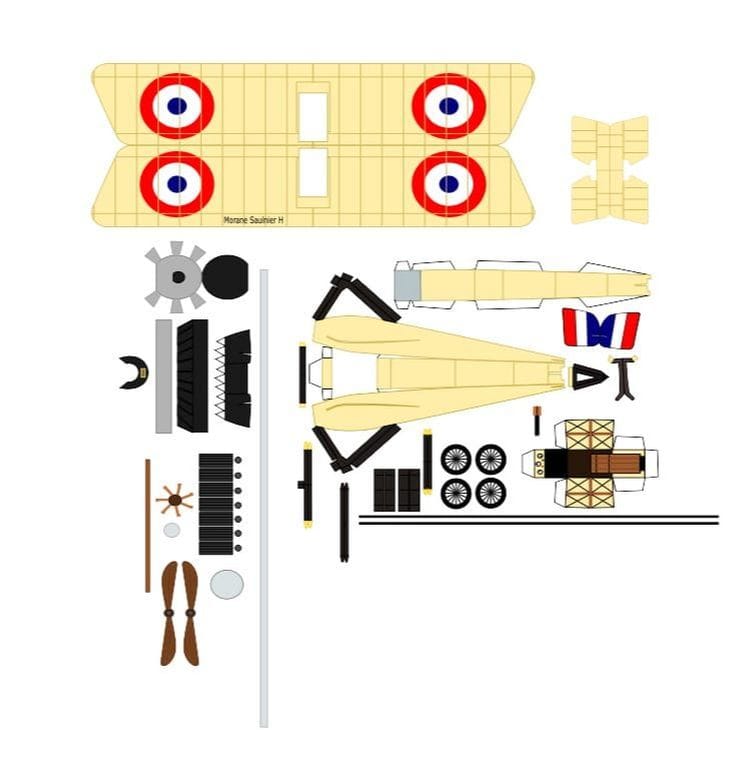
The pieces for the model. I am not going to create instructions for the construction process, but the parts are generally laid out in the order of construction from right to left.
Henschel Hs P.75
UPDATE: This project is currently on hold due to my (relatively) newfound discovery of building from digitally created templates. Although this model was coming along well enough, I don't really want to keep improvising parts and abstractly sketching design elements when I know a better way to go about doing the same things.
According to Luft46.com, "This 1941 aircraft design was to be a possible successor to the Messerschmitt Bf 110 heavy fighter. Although of a unusual configuration for that time, there were advantages (and disadvantages) to its rear wing/forward canard construction.
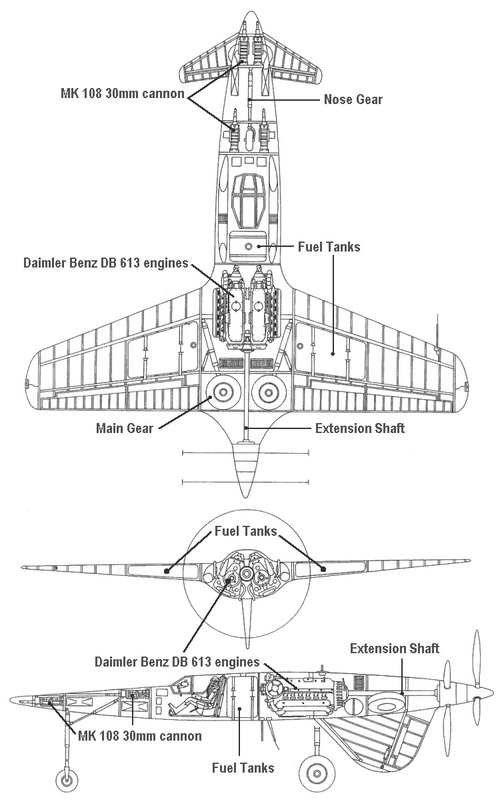
The Hs P.75 featured a tapered fuselage, with the slightly swept-back wings being mounted mid-fuselage and set back to the rear of the aircraft. The widened fuselage was designed to house the Daimler Benz DB 610 engine, which consisted of two DB 605 engines joined side-by-side, just aft of the cockpit. These were the same engines that the Heinkel He 177 used, and were found to be prone to overheating and catching fire. Due to this development, they were changed in 1942 to the liquid-cooled, 24 cylinder Daimler Benz DB 613 engines (two coupled DB 603s) that produced 3,500 horsepower. Both engine configurations were to drive
contra-rotating propellers (to offset tourque) of a 3.2m (10' 6") diameter via an extension shaft. There were a pair of swept-back canards located on the nose of the aircraft, that were to serve the purpose of elevators. The vertical tail unit was mounted beneath the fuselage, so that it could act as a tail bumper upon takeoff so that the propellers would not strike the ground. Since the propellers were located at the rear in a pusher configuration, a tricycle landing gear arrangement was chosen. Fuel was contained in three tanks, one in each wing and one behind the cockpit. A single pilot sat in the cockpit which was located about midway along the fuselage, and four Mk 108 30mm cannons were mounted in the nose.
The advantage of the pusher propeller/forward canard design was that it opened up the pilot's view, plus the weapons installation was much simplified and could be concentrated. The disadvantages would be engine cooling plus an ejection system or propeller jettison would have to be designed for the pilot to safely exit the plane in case of an emergency."
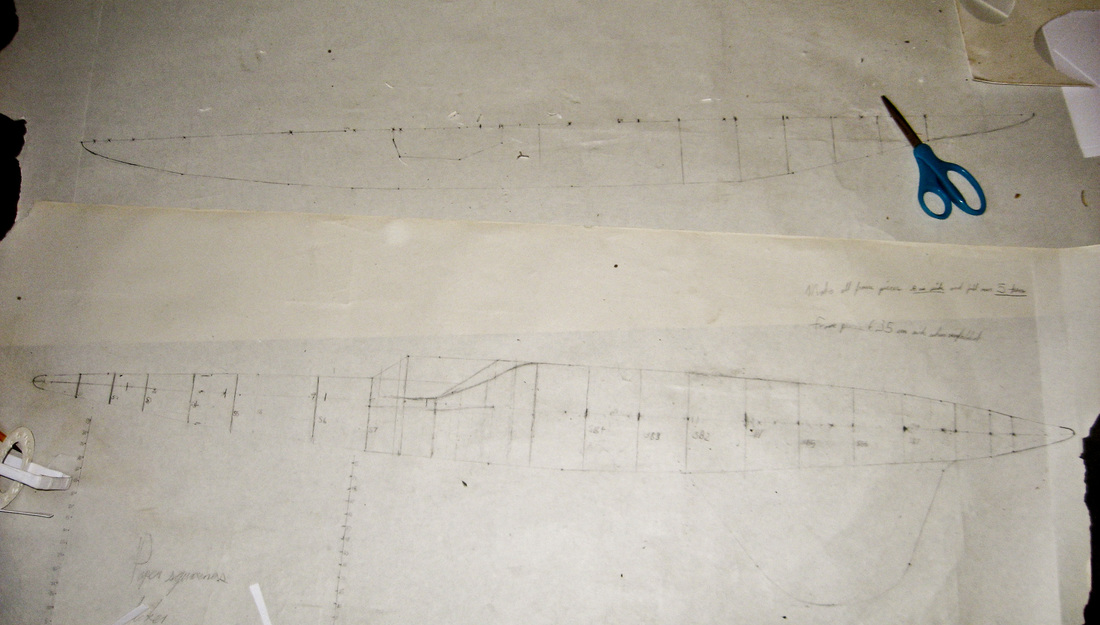
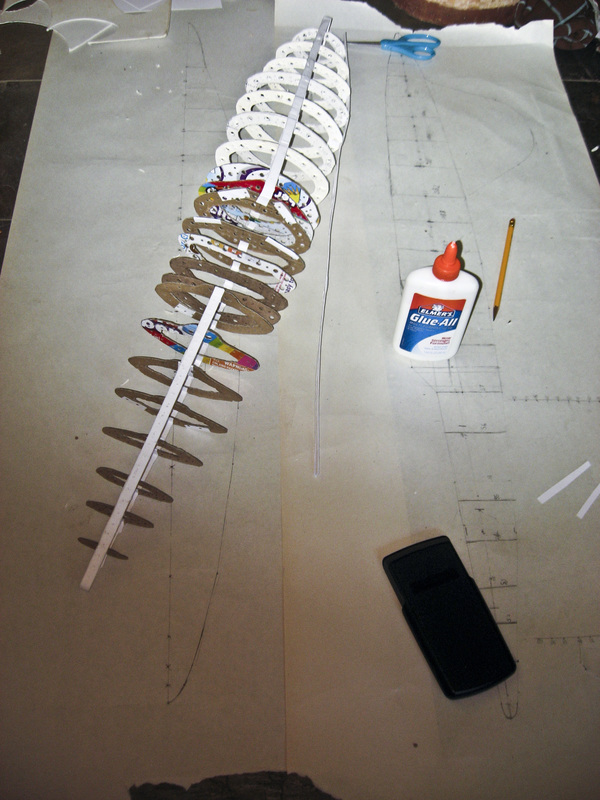
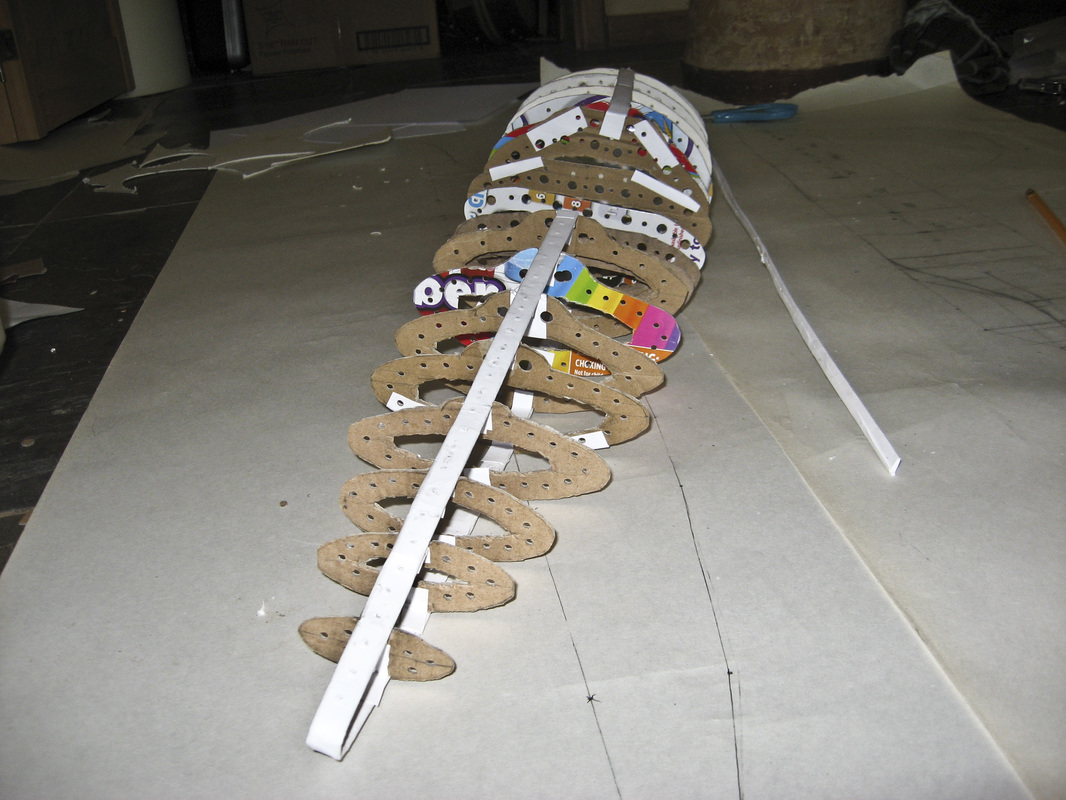
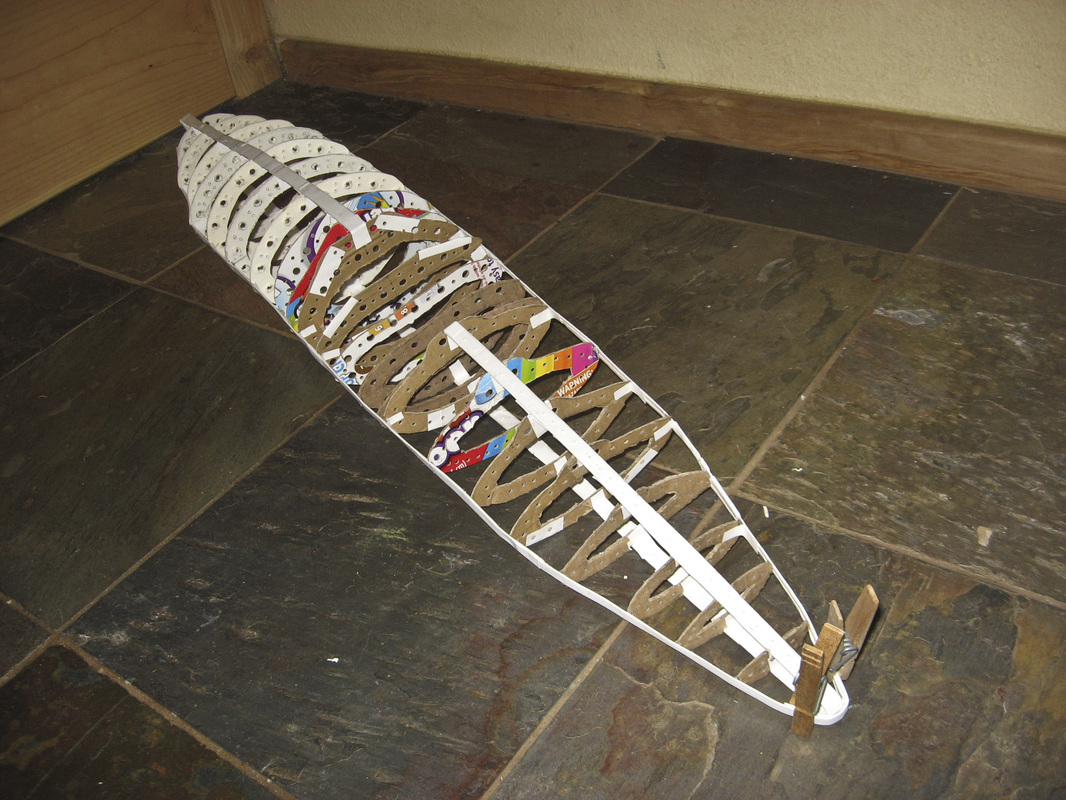
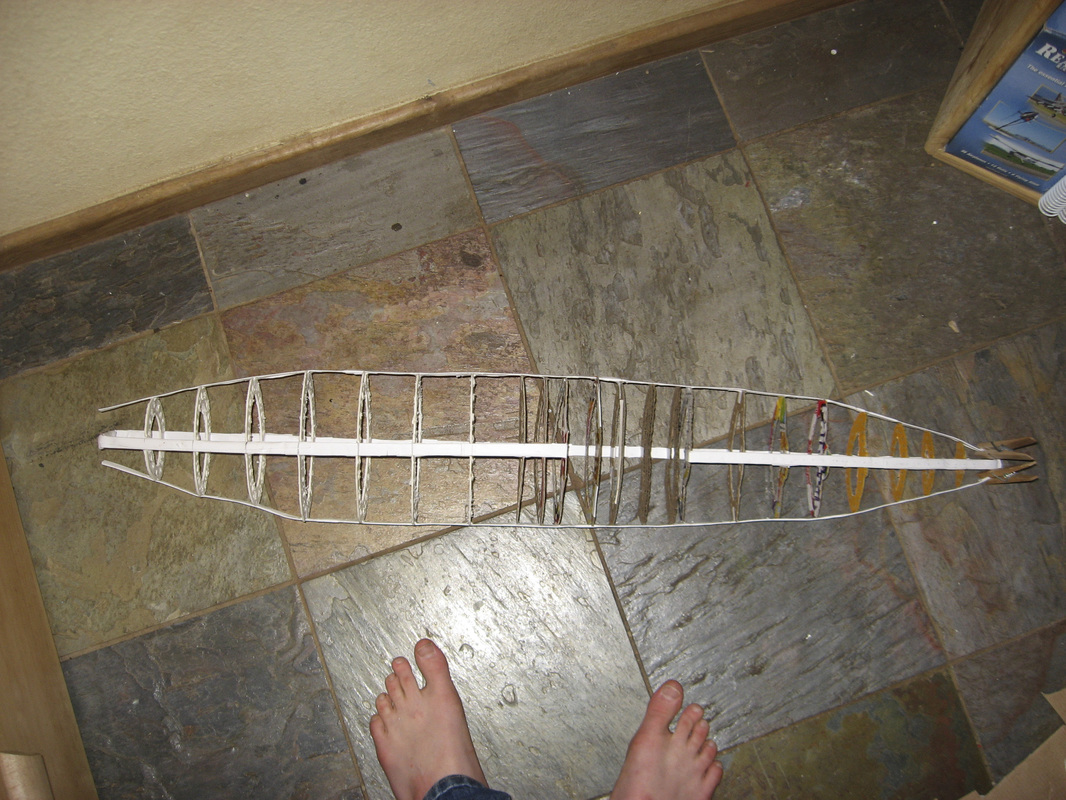
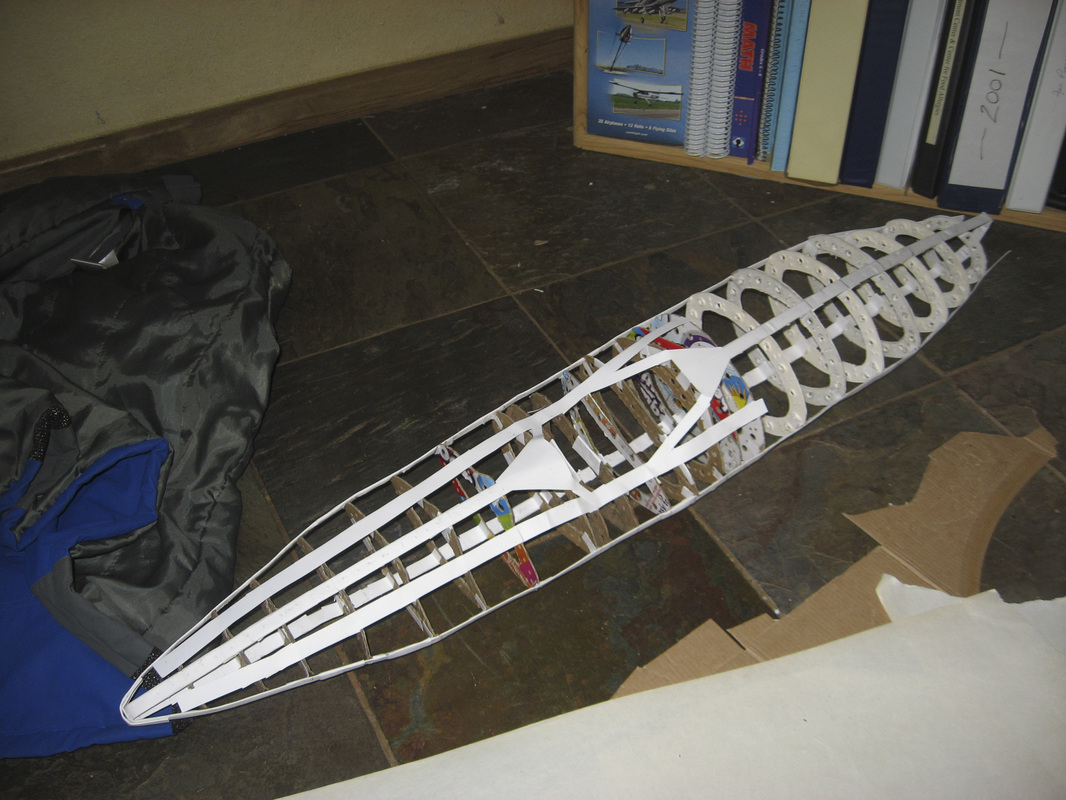
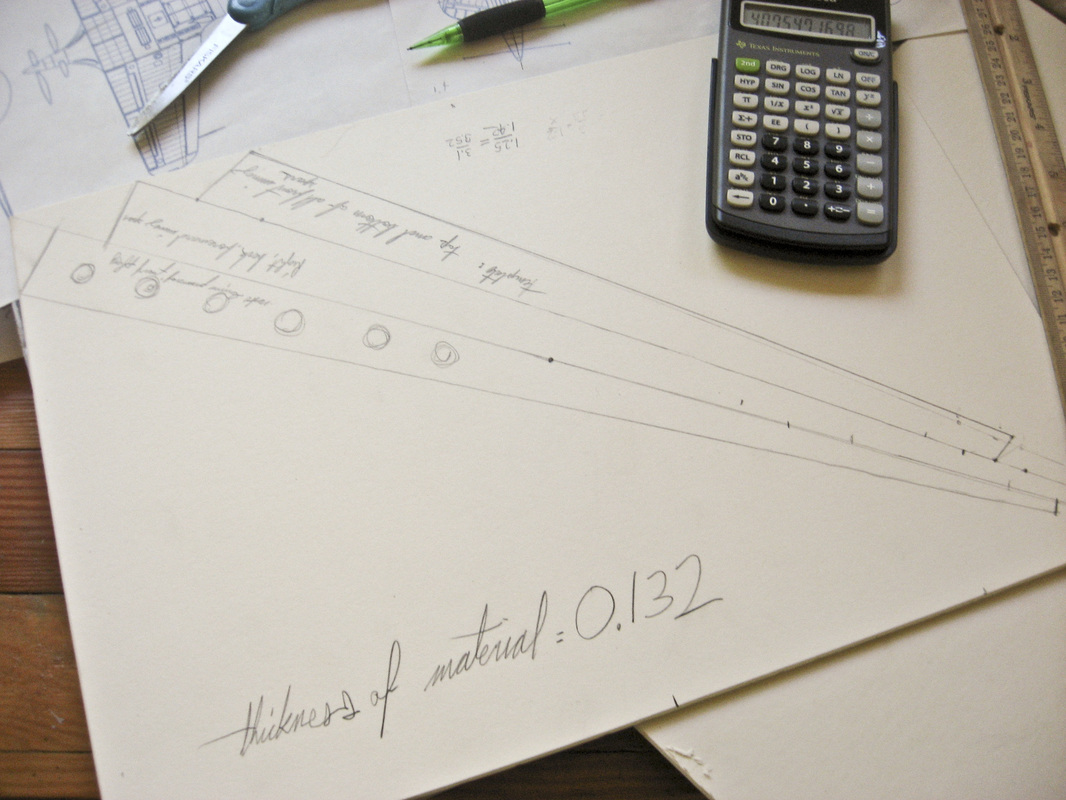
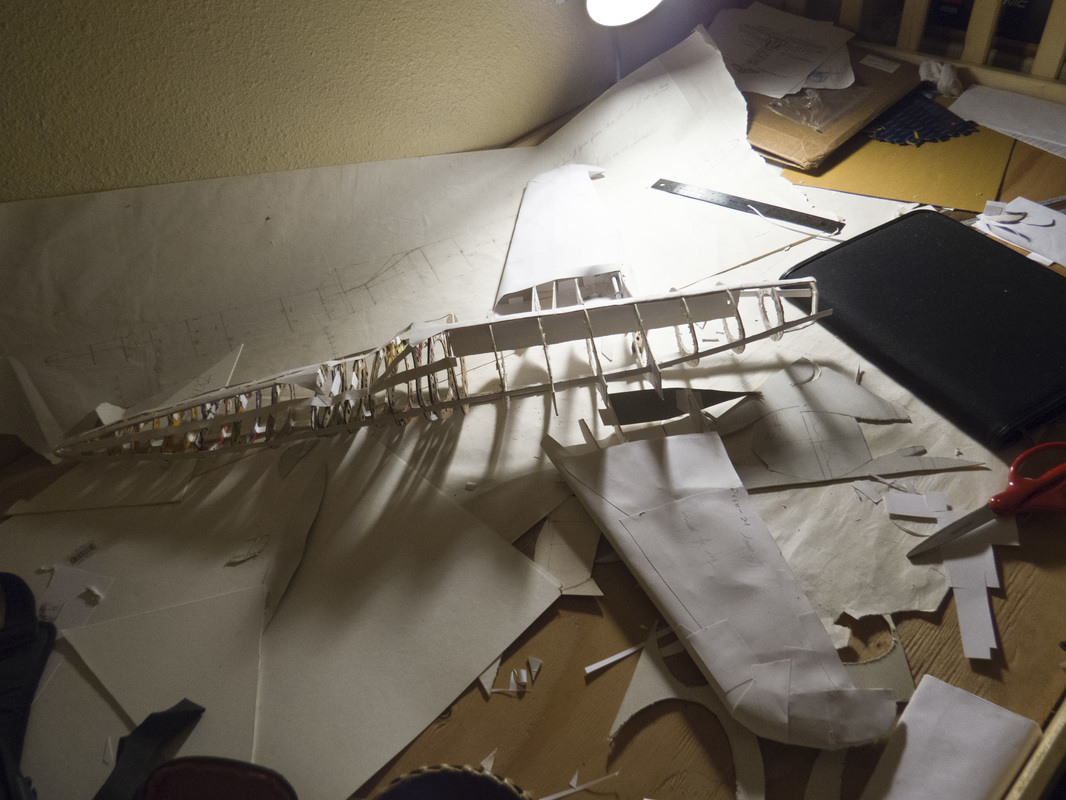
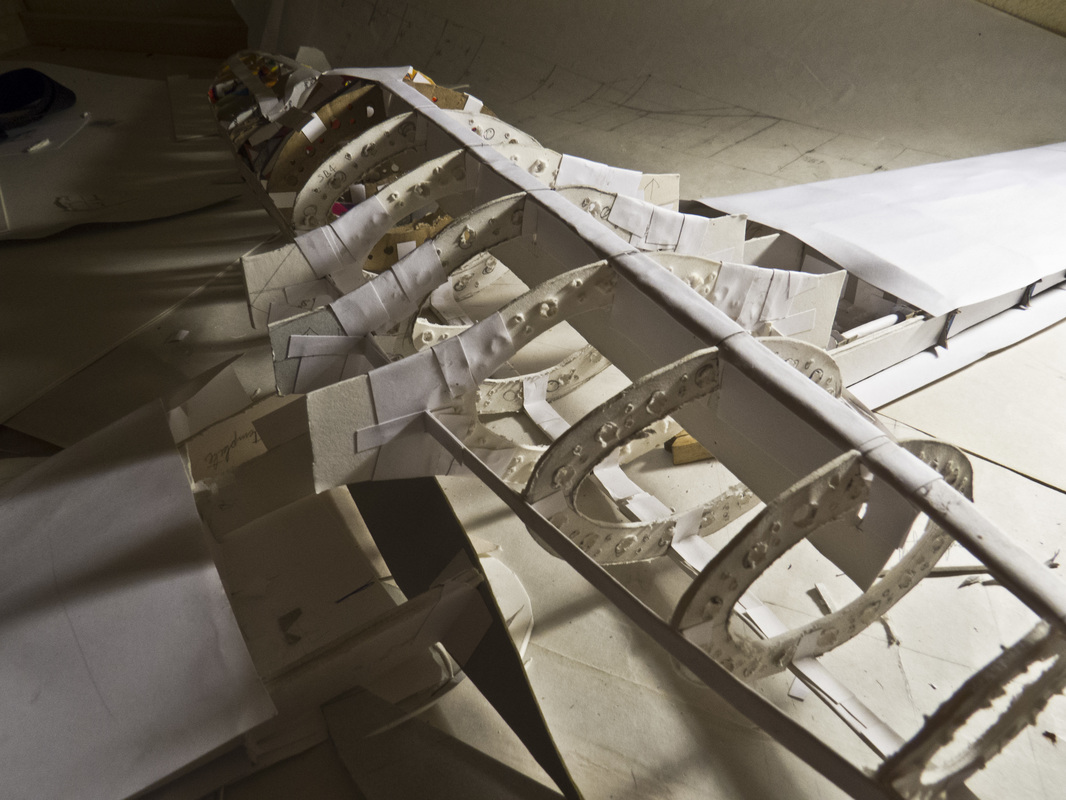
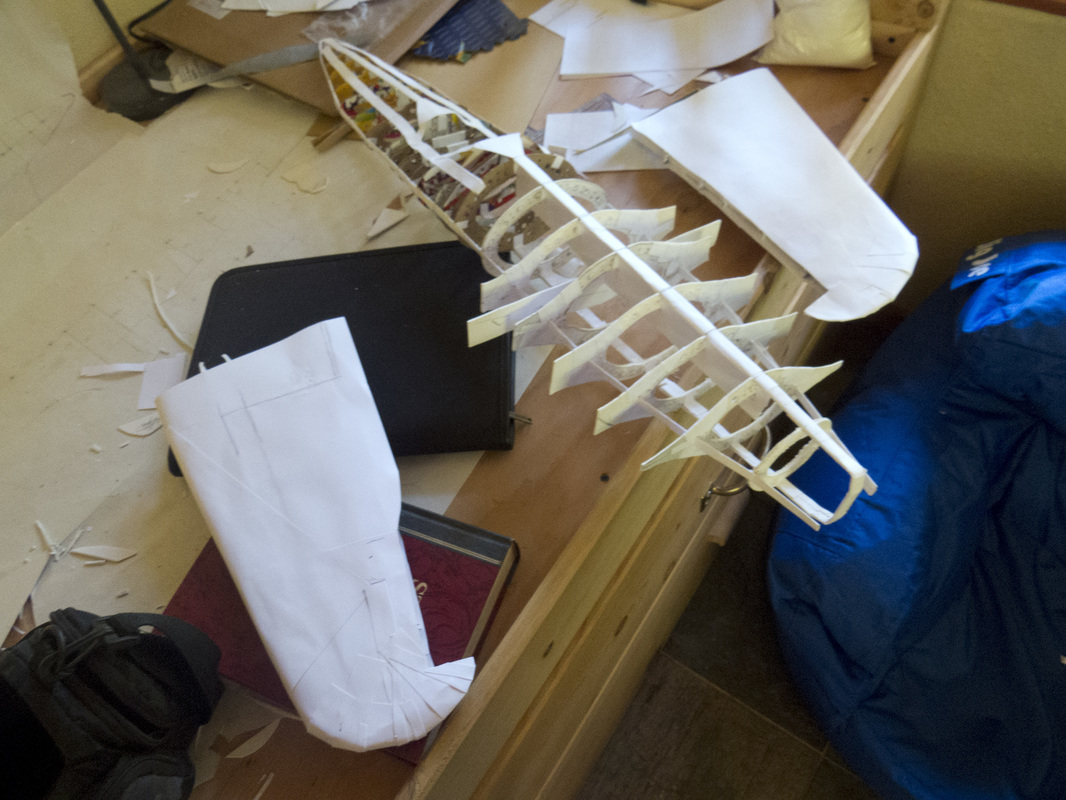
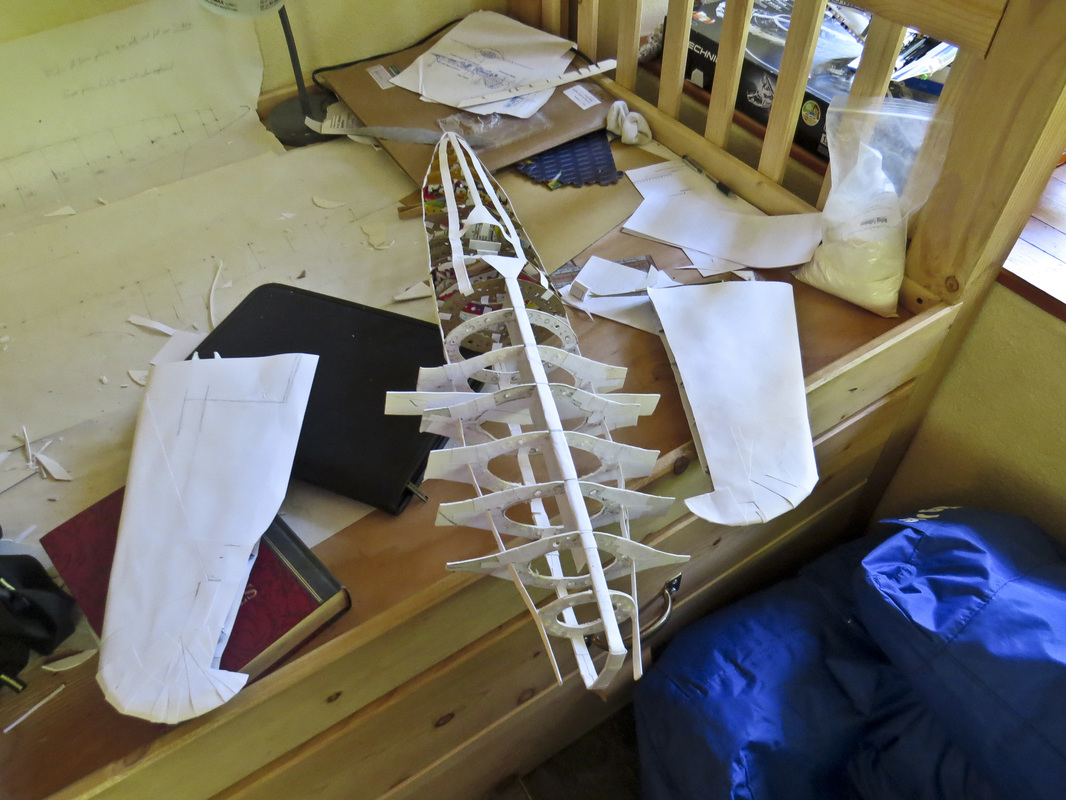
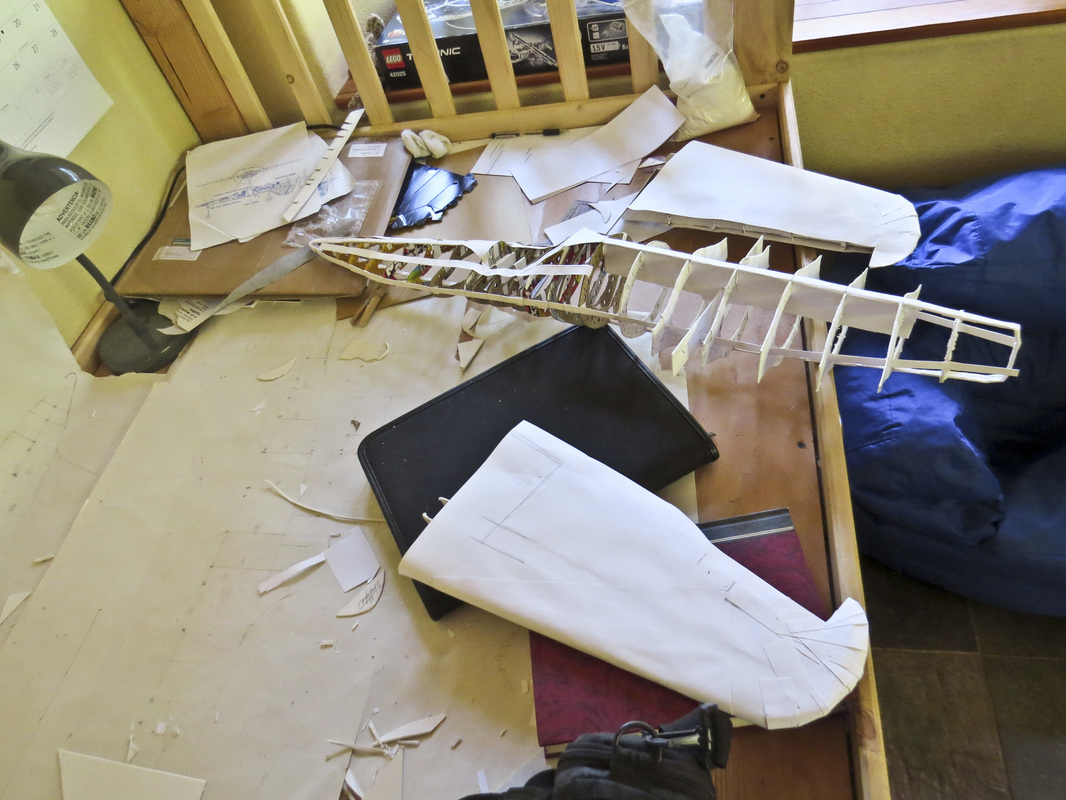
I decided to build this plane simply because I liked the way it looked. I like the canard design and everything about the plane seems smooth and powerful. However, my project has suffered somewhat from a lack of information about the aircraft. Finding pictures or drawings that are accurate or consistent on the web has been all but impossible, and even counting what I can't use, I have found under 15 information sources and most of these have contributed little more than a page of vital facts. To look at it in a positive way though, this has left me quite a bit of room for creative interpretation which has been quite interesting; where will the fuel tanks go? Where are the landing gear going to fit and how will they extend? What should the cockpit look like? I have had to answer these and many other questions about internal details and have been able to only find two consistent drawings of the exterior and one invaluable set of cutaways. For this project, I decided to start with building a frame (versus the usual monocoque fuselages I build) and have found this to be a very effective construction method. I would like to rebuild my frame because I didn't think it out well enough before building it and it has some pronounced structural weaknesses, but I am going to keep it so I can experiment with other parts of the construction process instead of staying in an endless and discouraging loop of frame building.
I am going to attempt the incorporation of quite a few sets of moving parts. I have added a few to the design that would not have normally existed (such as folding wings) for storage purposes.
According to Luft46.com, "This 1941 aircraft design was to be a possible successor to the Messerschmitt Bf 110 heavy fighter. Although of a unusual configuration for that time, there were advantages (and disadvantages) to its rear wing/forward canard construction.
The Hs P.75 featured a tapered fuselage, with the slightly swept-back wings being mounted mid-fuselage and set back to the rear of the aircraft. The widened fuselage was designed to house the Daimler Benz DB 610 engine, which consisted of two DB 605 engines joined side-by-side, just aft of the cockpit. These were the same engines that the Heinkel He 177 used, and were found to be prone to overheating and catching fire. Due to this development, they were changed in 1942 to the liquid-cooled, 24 cylinder Daimler Benz DB 613 engines (two coupled DB 603s) that produced 3,500 horsepower. Both engine configurations were to drive
contra-rotating propellers (to offset tourque) of a 3.2m (10' 6") diameter via an extension shaft. There were a pair of swept-back canards located on the nose of the aircraft, that were to serve the purpose of elevators. The vertical tail unit was mounted beneath the fuselage, so that it could act as a tail bumper upon takeoff so that the propellers would not strike the ground. Since the propellers were located at the rear in a pusher configuration, a tricycle landing gear arrangement was chosen. Fuel was contained in three tanks, one in each wing and one behind the cockpit. A single pilot sat in the cockpit which was located about midway along the fuselage, and four Mk 108 30mm cannons were mounted in the nose.
The advantage of the pusher propeller/forward canard design was that it opened up the pilot's view, plus the weapons installation was much simplified and could be concentrated. The disadvantages would be engine cooling plus an ejection system or propeller jettison would have to be designed for the pilot to safely exit the plane in case of an emergency."
I decided to build this plane simply because I liked the way it looked. I like the canard design and everything about the plane seems smooth and powerful. However, my project has suffered somewhat from a lack of information about the aircraft. Finding pictures or drawings that are accurate or consistent on the web has been all but impossible, and even counting what I can't use, I have found under 15 information sources and most of these have contributed little more than a page of vital facts. To look at it in a positive way though, this has left me quite a bit of room for creative interpretation which has been quite interesting; where will the fuel tanks go? Where are the landing gear going to fit and how will they extend? What should the cockpit look like? I have had to answer these and many other questions about internal details and have been able to only find two consistent drawings of the exterior and one invaluable set of cutaways. For this project, I decided to start with building a frame (versus the usual monocoque fuselages I build) and have found this to be a very effective construction method. I would like to rebuild my frame because I didn't think it out well enough before building it and it has some pronounced structural weaknesses, but I am going to keep it so I can experiment with other parts of the construction process instead of staying in an endless and discouraging loop of frame building.
I am going to attempt the incorporation of quite a few sets of moving parts. I have added a few to the design that would not have normally existed (such as folding wings) for storage purposes.

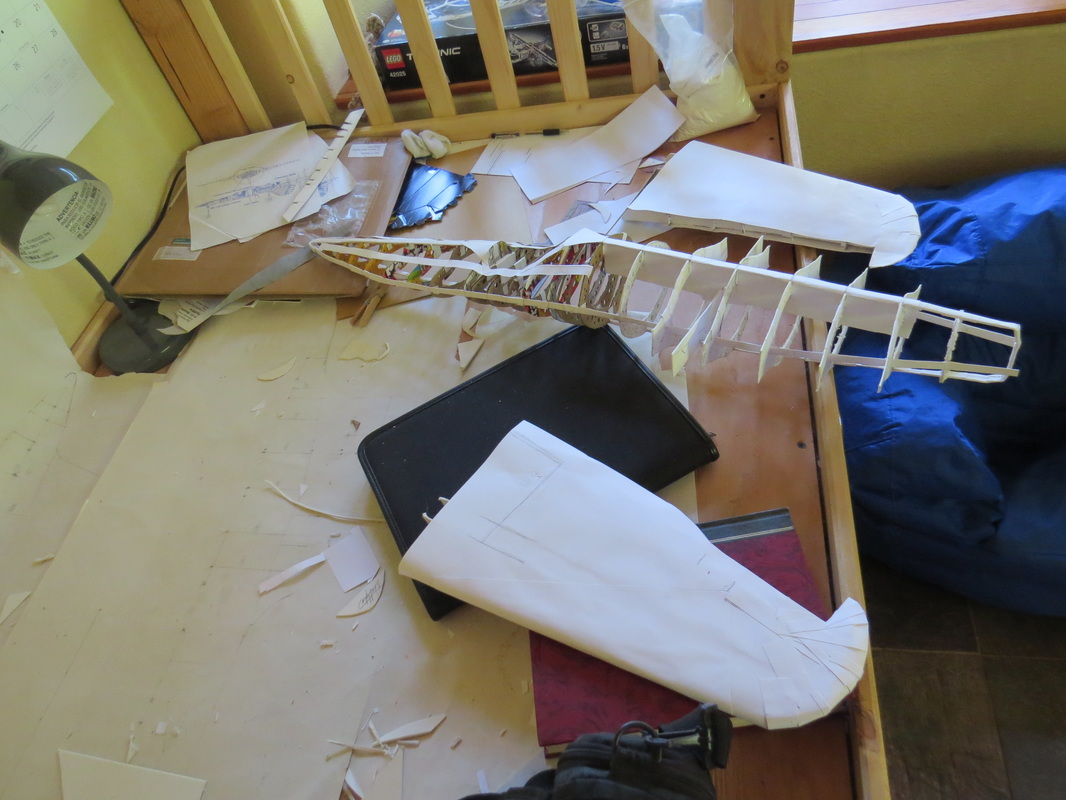
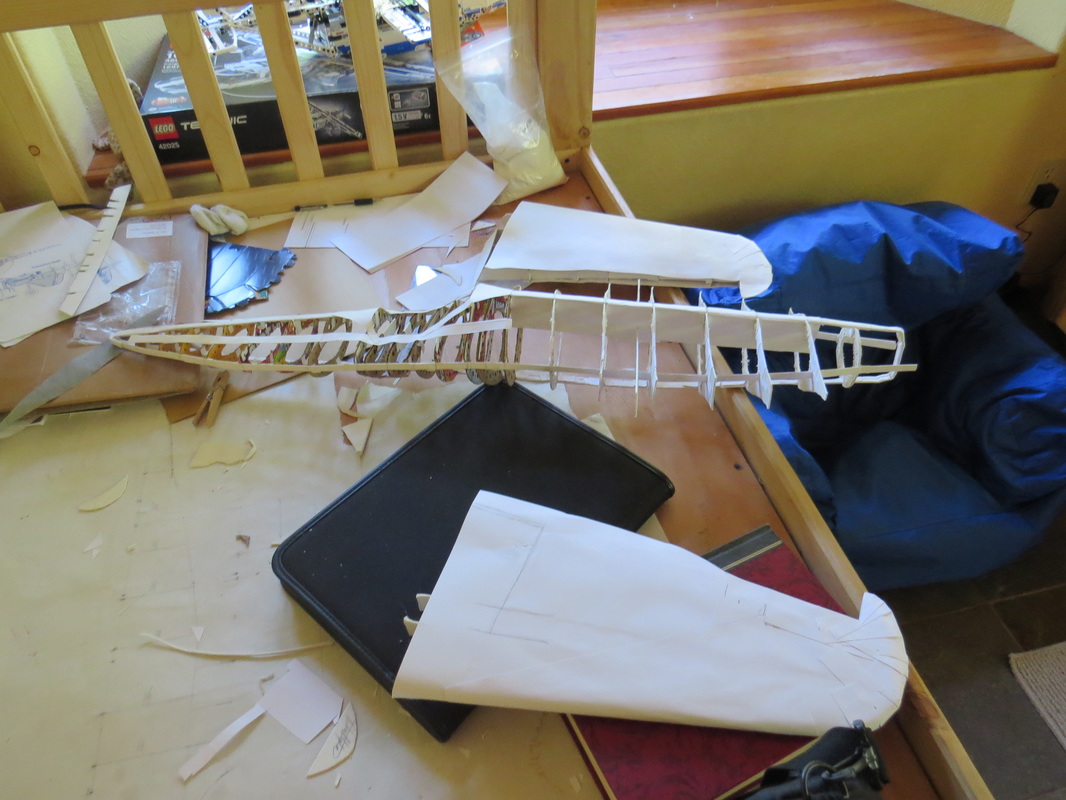

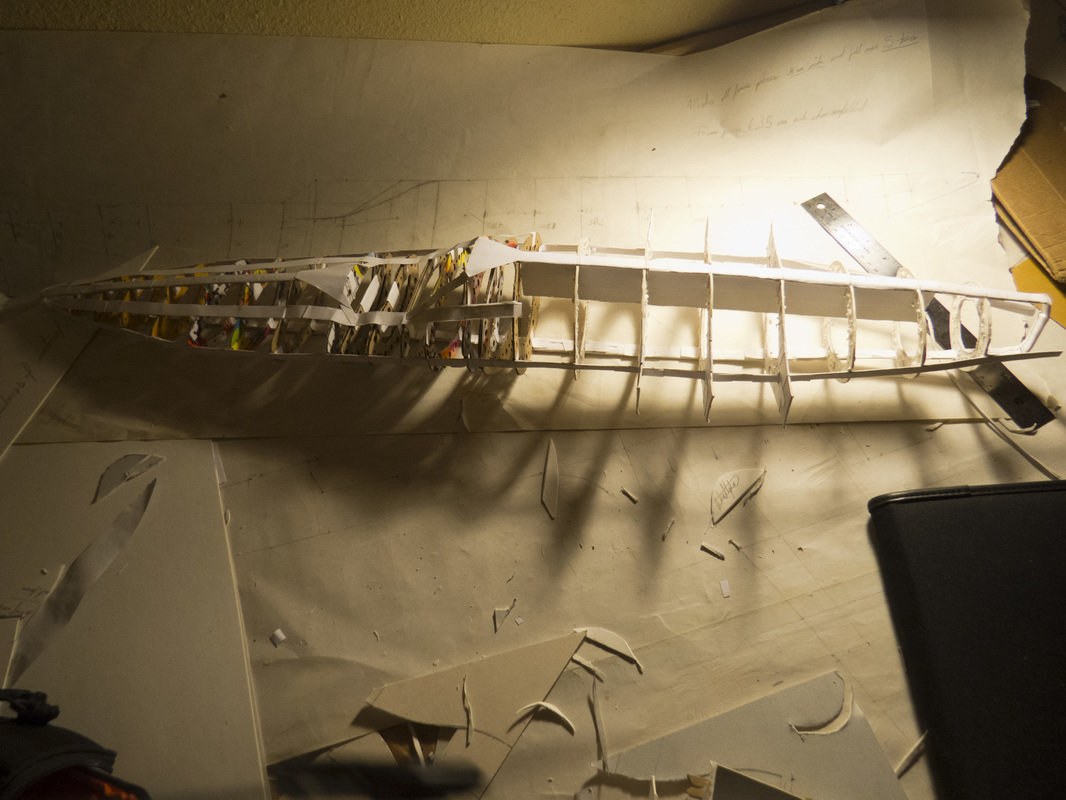
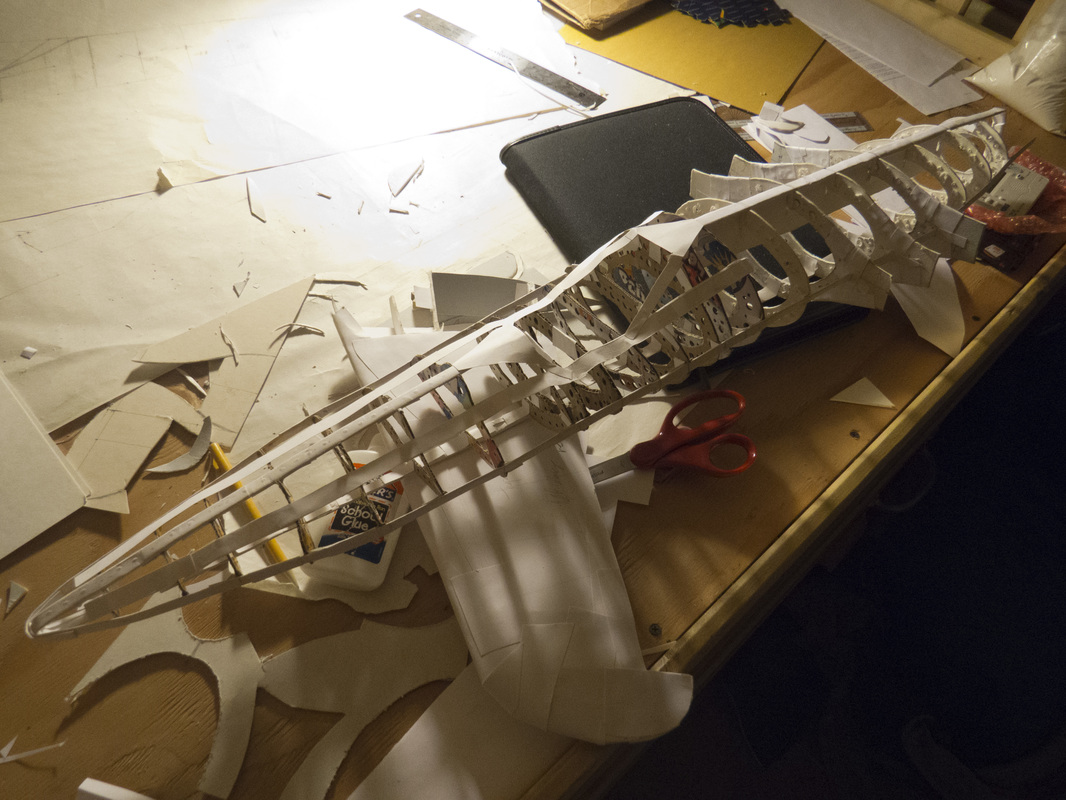
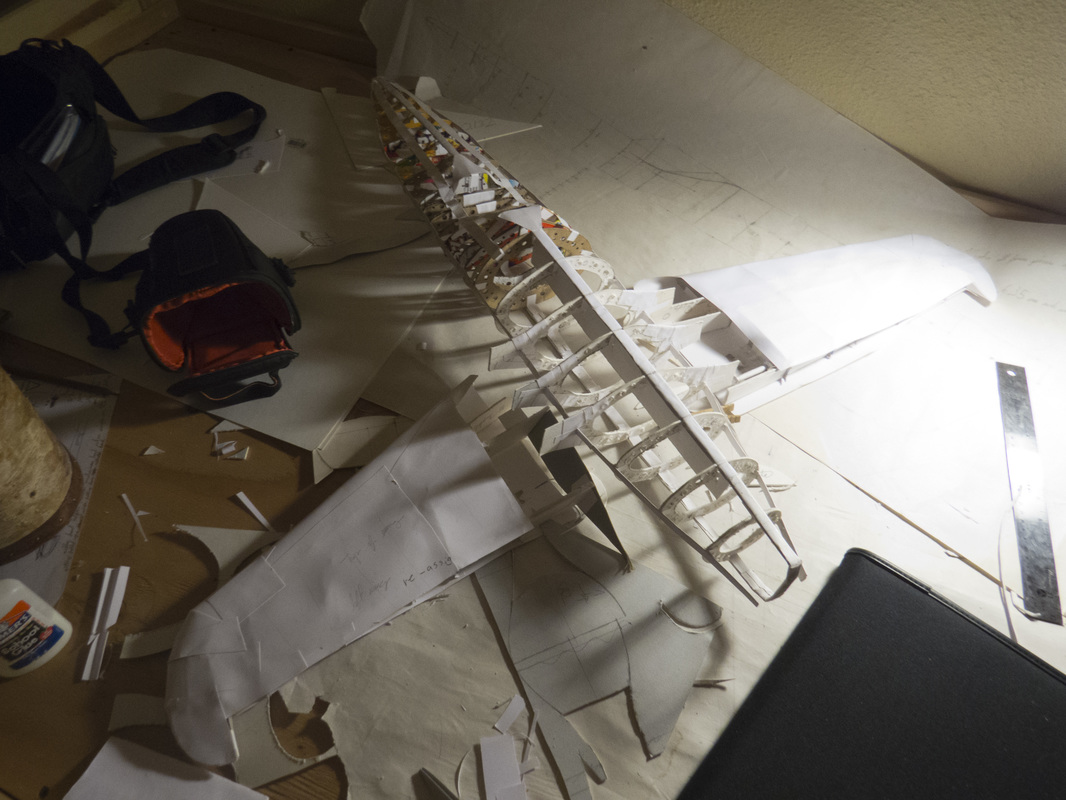
A brief overview of the construction process up to the model's current state.


Large Size Finished Models
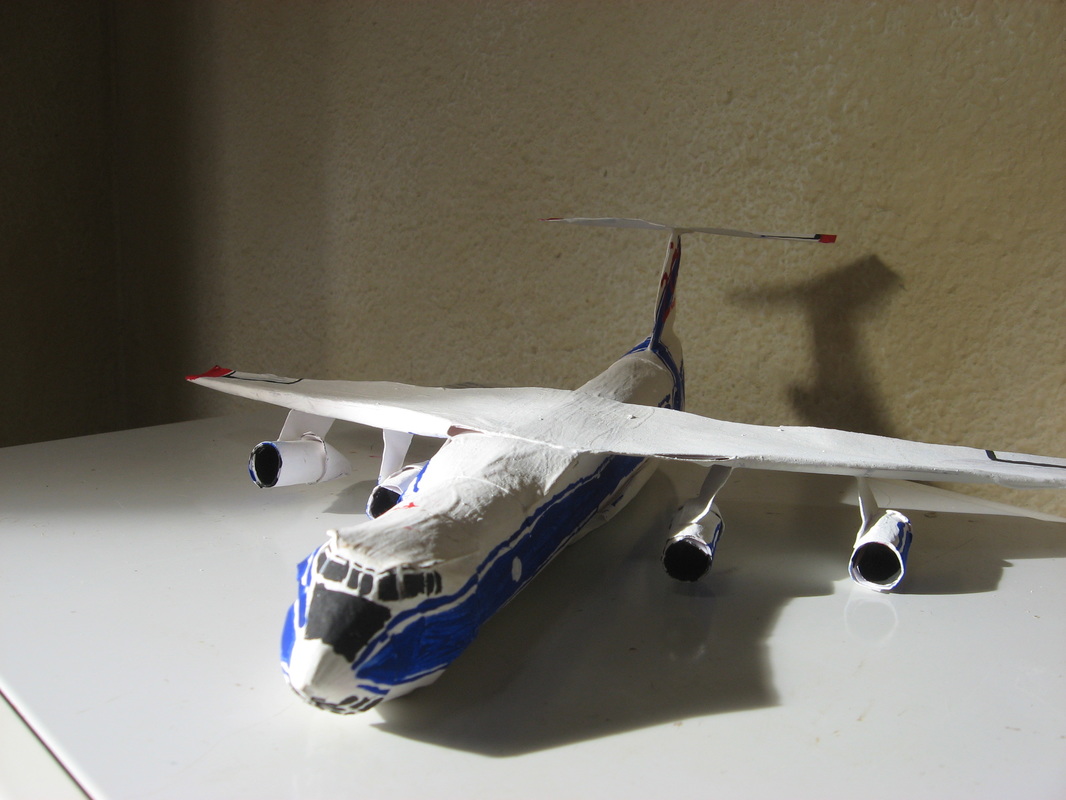
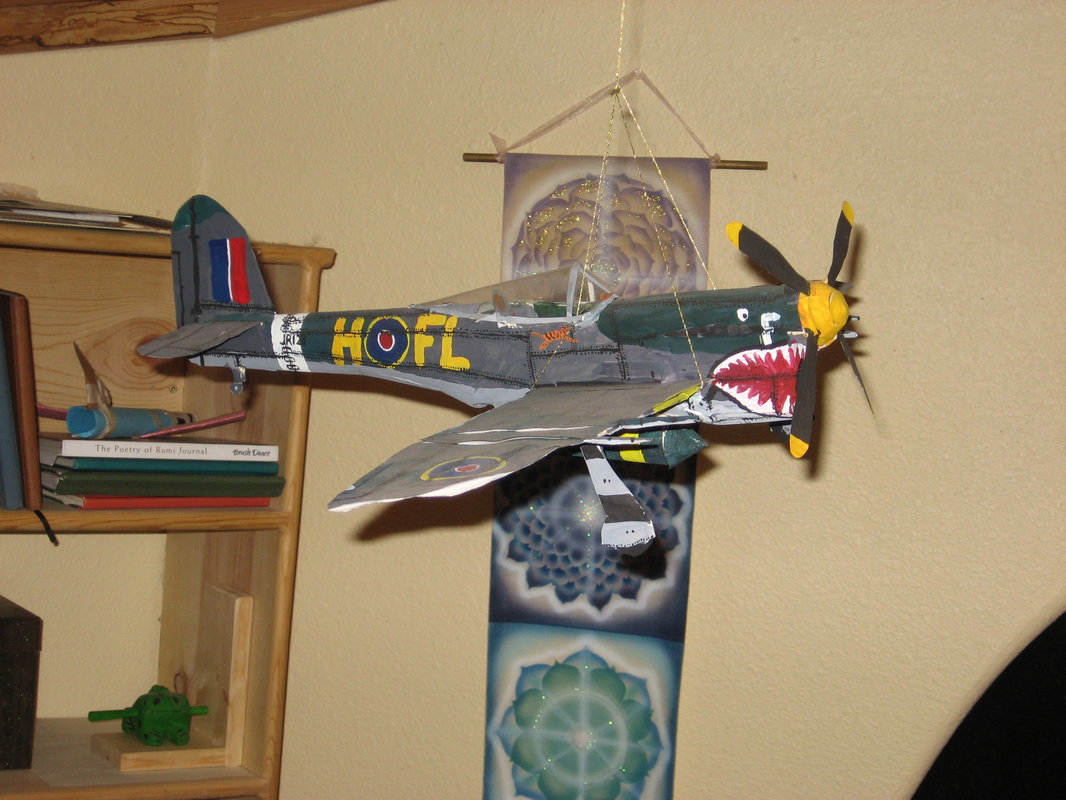
Bristol Beaufighter
This is my most recent finished, large size, paper model. Despite this, I finished it quite a few years ago and can now see endless improvements needing to be made. One of my main errors is that I didn't pre-plan the model using drawings of the real thing. This resulted in a model that was, although not bad, not proportioned very much like the plane it was supposedly modeled after.
This is my most recent finished, large size, paper model. Despite this, I finished it quite a few years ago and can now see endless improvements needing to be made. One of my main errors is that I didn't pre-plan the model using drawings of the real thing. This resulted in a model that was, although not bad, not proportioned very much like the plane it was supposedly modeled after.
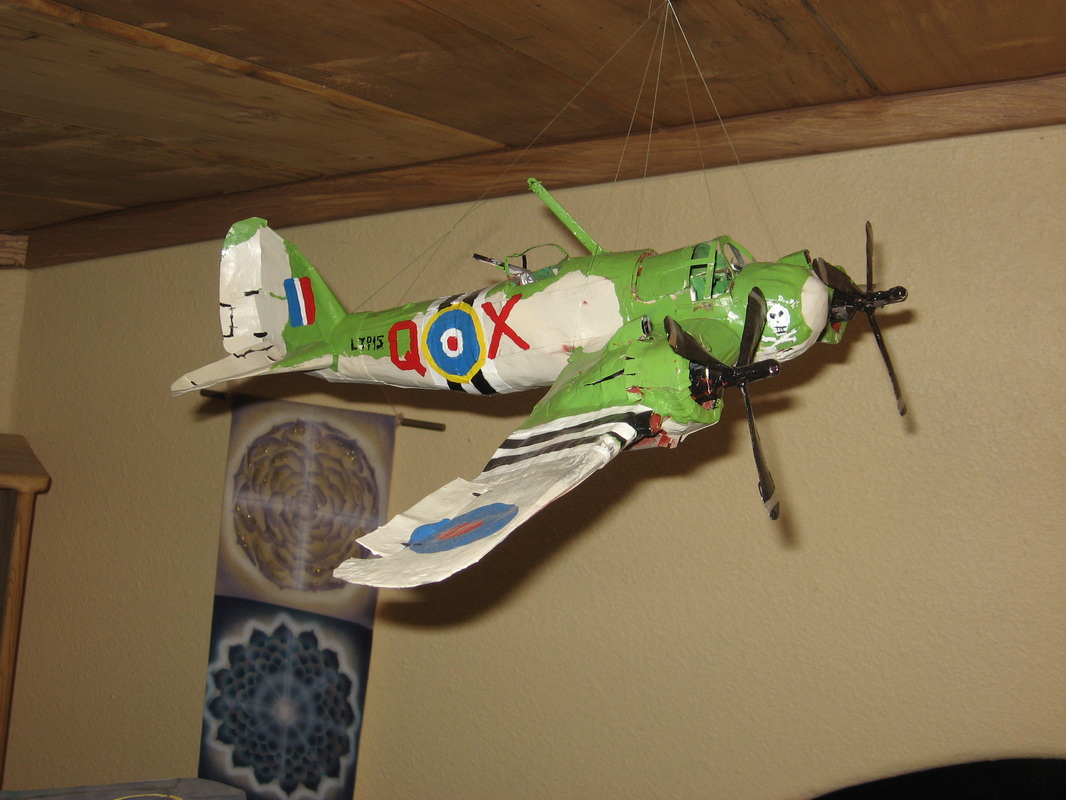
Hawker Typhoon
This was the result of my first attempt at a larger size model. It has quite a range of structural and proportional problems, but for a first try, I felt this wasn't too bad. I came up with the idea of building larger size models, surprisingly, long after I had begun building paper models. As soon as I started though, I could see right away that the larger size would lead to an opportunity to make a much more detailed, impressive looking model. At the time I built it I put all the detail, knowledge, and forethought I could into the model (even painting on the rivets), and although now I could see a million things to improve, it is still one of my favorite models and continues to hang peacefully from bedroom my ceiling.
This was the result of my first attempt at a larger size model. It has quite a range of structural and proportional problems, but for a first try, I felt this wasn't too bad. I came up with the idea of building larger size models, surprisingly, long after I had begun building paper models. As soon as I started though, I could see right away that the larger size would lead to an opportunity to make a much more detailed, impressive looking model. At the time I built it I put all the detail, knowledge, and forethought I could into the model (even painting on the rivets), and although now I could see a million things to improve, it is still one of my favorite models and continues to hang peacefully from bedroom my ceiling.
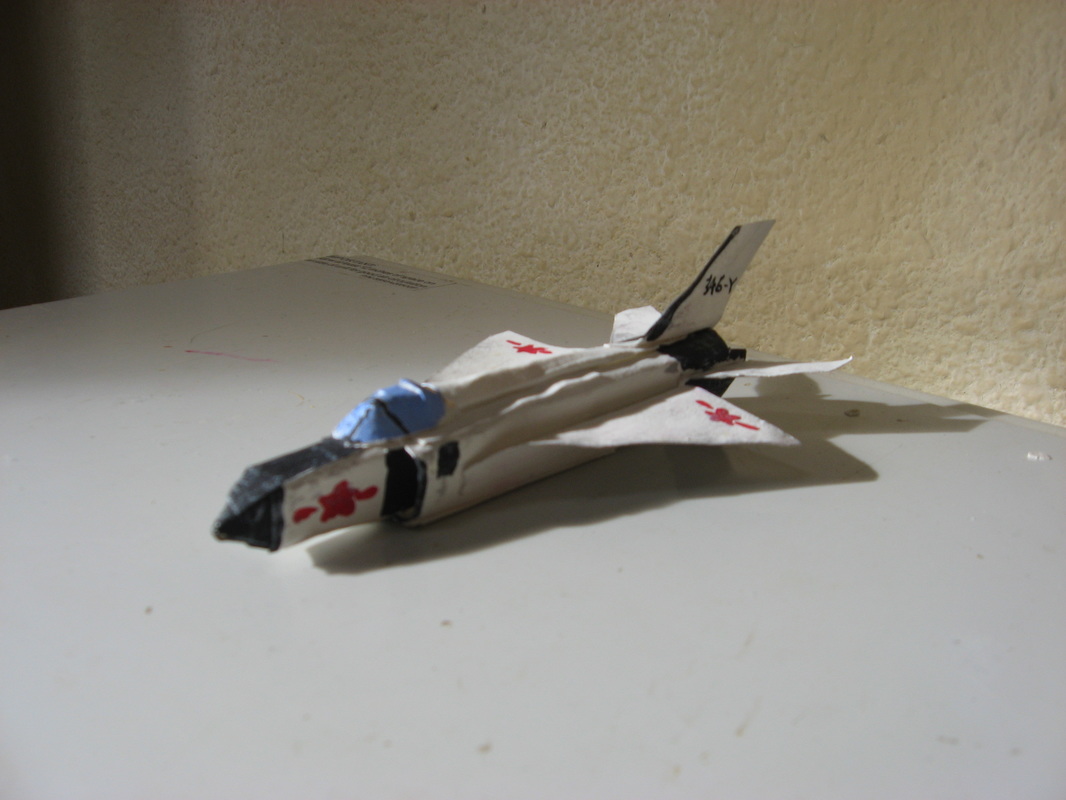
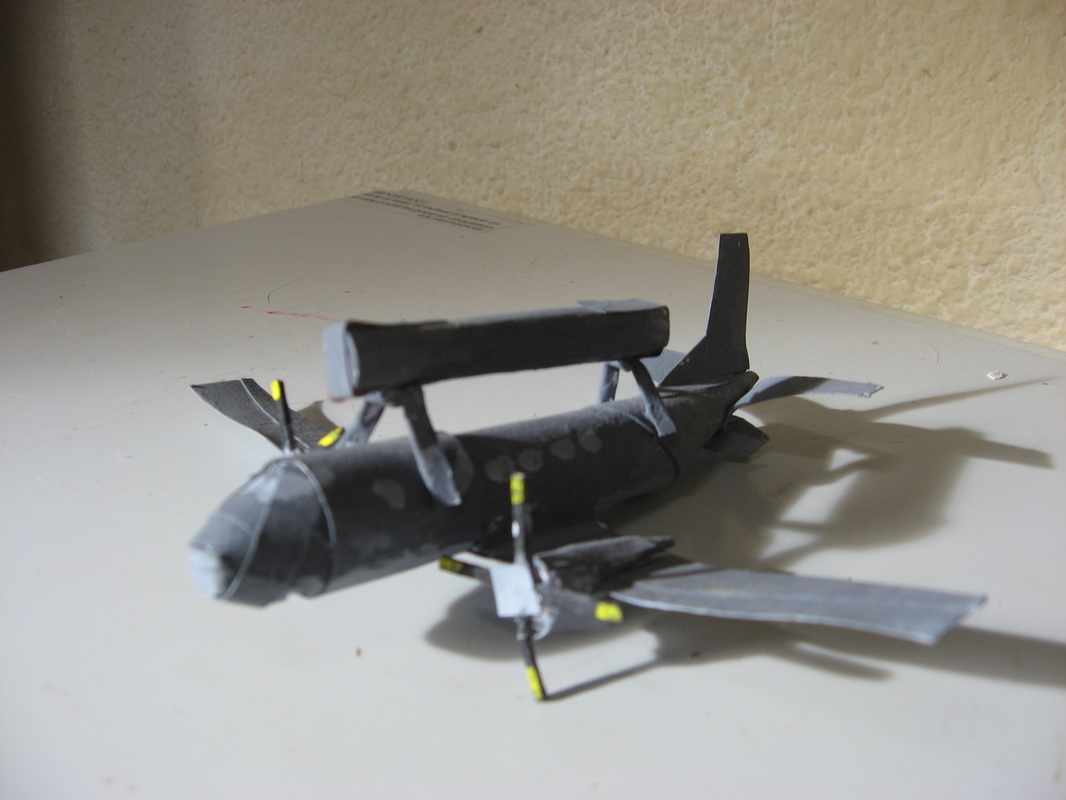
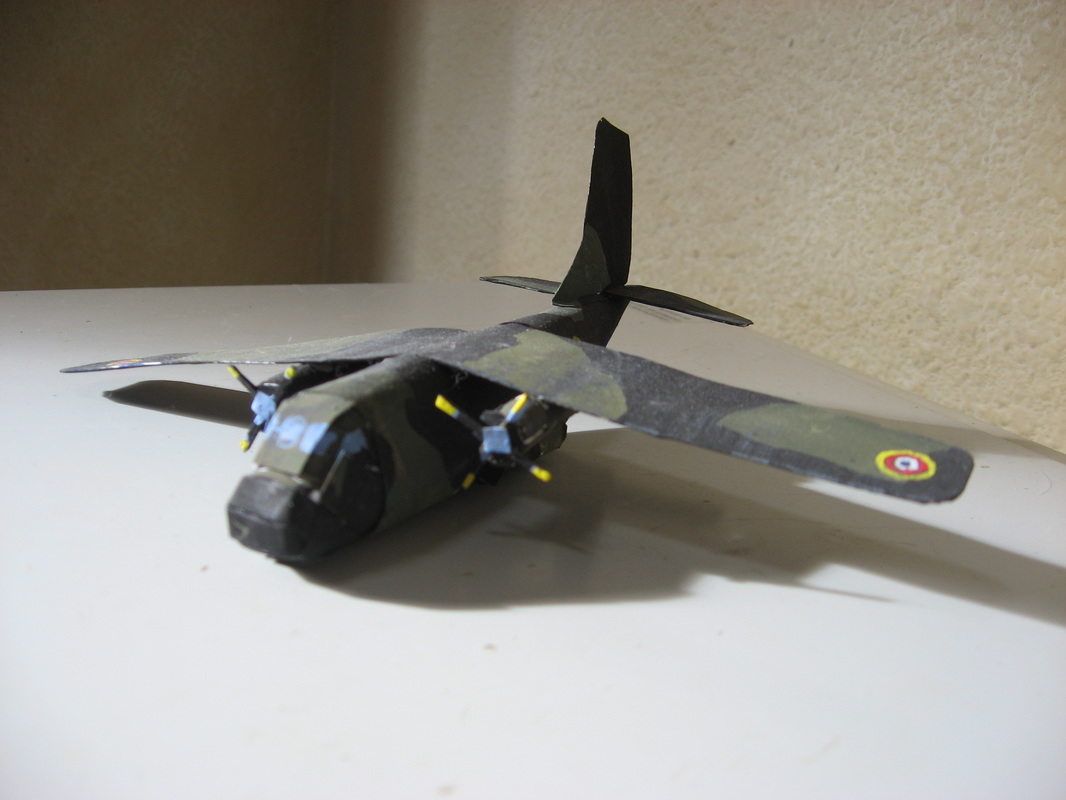
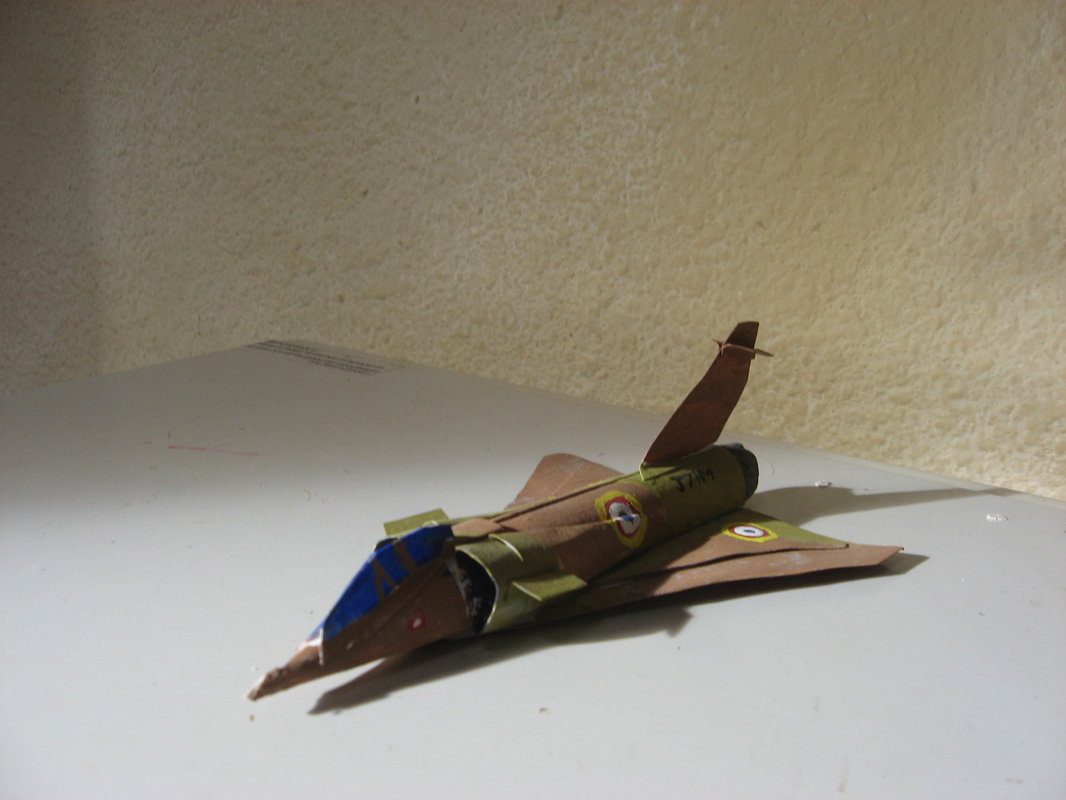
Smaller Scale Projects
Along with many of my large scale/time investment models, I have built a collection of smaller, "cuter," models. These don't take nearly as long to build and are still interesting to have around.